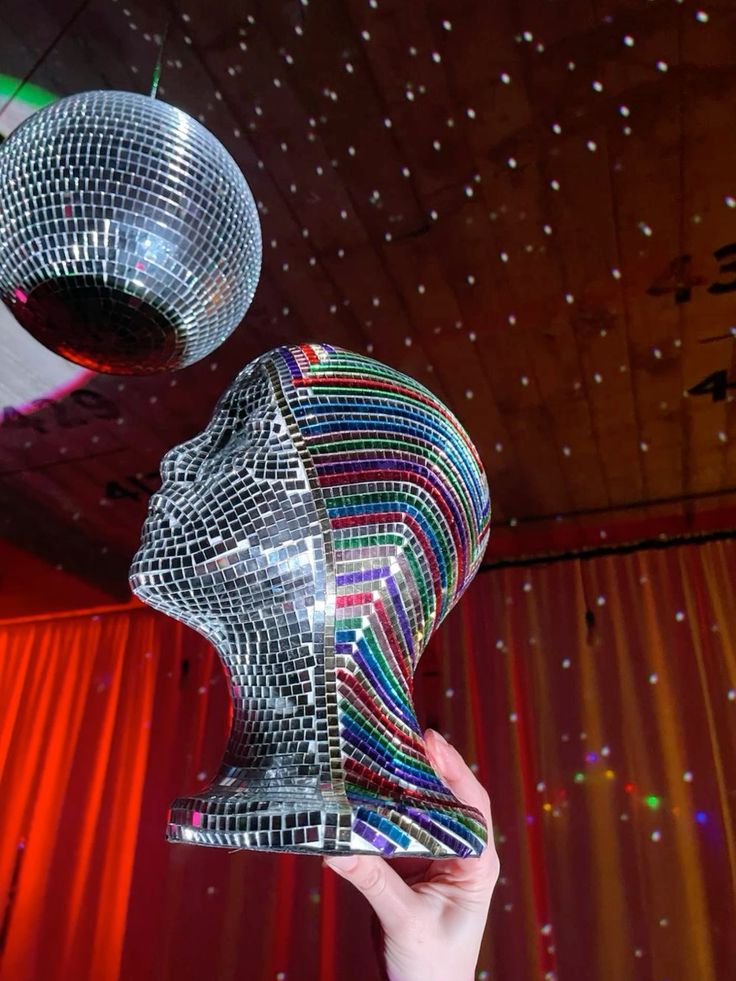
A disco ball-inspired makeup mirror is a perfect blend of glam, sparkle, and functionality. Whether you love retro aesthetics or modern chic designs, this DIY project adds a unique, eye-catching statement to your vanity. The mirrored mosaic effect reflects light beautifully, making your makeup application more radiant and luxurious.
FAQs About DIY Disco Ball Makeup Mirrors
- What type of mirror works best for this project?
- A round or oval makeup mirror works best, but any shape can be transformed.
- Where can I find disco ball mirror tiles?
- You can get them from craft stores, online marketplaces, or by repurposing an old disco ball.
- What adhesive should I use for attaching mirror tiles?
- A strong glass adhesive or industrial-strength glue ensures the tiles stay secure.
- How can I make the mirror frame more durable?
- Use a wooden or metal-framed mirror for stability, and seal the edges with clear epoxy for extra protection.
- Can I add LED lights for extra glam?
- Yes! Stick-on LED strip lights around the edges will enhance the reflective effect.
Step-by-Step Guide to Making a Disco Ball-Inspired Makeup Mirror
Materials Needed:
- A makeup mirror (round or oval works best)
- Small mirror tiles or pieces (from a broken disco ball or craft store)
- Glass adhesive or strong glue
- Tweezers or small pliers for handling tiles
- LED strip lights (optional for added glow)
- Silver or metallic paint (optional for extra shimmer)
Instructions:
Step 1: Prepare Your Mirror
- Clean the mirror surface and frame with a damp cloth to remove dust or oils.
- If the frame is plastic or wood, consider painting it silver or metallic for a cohesive disco theme.
Step 2: Arrange the Mirror Tiles
- If using a pre-cut disco ball tile sheet, measure and cut pieces to fit around the frame.
- For individual tiles, arrange them in a pattern before gluing to ensure symmetry.
Step 3: Attach the Tiles
- Apply a small amount of glass adhesive to the back of each tile.
- Press each piece firmly onto the mirror frame, working in sections.
- Use tweezers to place smaller tiles in tighter spaces.
Step 4: Let It Dry
- Allow the adhesive to dry for at least 12-24 hours to ensure durability.
Step 5: Add LED Lights (Optional)
- Attach LED strip lights around the mirror’s edge for a glamorous, glowing effect.
- Secure with adhesive backing or a small amount of glue.
Step 6: Final Touches
- Wipe the mirror tiles with a glass cleaner to enhance their shine.
- Place the mirror in a well-lit area where it can reflect natural or artificial light for a dazzling effect.
Final Thoughts
Creating a disco ball-inspired makeup mirror is an easy, budget-friendly DIY project that adds glamour and sparkle to your beauty space. Whether you use it for daily makeup routines or as a decorative piece, this mirror will instantly brighten your vanity area with a trendy, retro aesthetic.